
零基础——用 AI Agent 建系统发育树(phylo-tree-build) | 全程复制粘贴
本教程以 workbuddy 作为 AI agent、Hy3 作为 AI API 为例。AI agent 本身的安装与配置请看AI Agent 安装教程。
在开始之前(必读):
- 如果你是第一次用 AI agent 做生信分析,强烈建议先跟一遍 bulk-RNA-seq 差异分析教程,熟悉"装技能 → 配环境 → 跑示例 → 换自己数据"的完整流程,再回来做本技能。
- 一句话:一个目录的基因组 fasta 进,Newick 树文件出——bcgTree 拼接核心基因 → IQ-TREE2 自动选模 + 1000 次超快自举建主树 → 可选 parsnp 按组建子树。脚本来自一项已发表的 67 株 CRE 研究的实战流程。
- 本技能在 Windows 上需要 WSL2 + Ubuntu 24.04(Step 2 会带你配)。这是全库环境最重的技能之一,但只需配一次。
- 两条黄金规则(务必记住):
- 工作目录必须纯 ASCII(不能有中文路径)——bcgTree/Perl 遇到非 ASCII 路径即崩;脚本默认把基因组复制到
~/phylo_work里跑,结果再拷回。 - 建树本身只产树文件(.treefile),不产图。要看图请用配套技能 phylo-tree-plot(它直接吃本技能的产出)。
- 工作目录必须纯 ASCII(不能有中文路径)——bcgTree/Perl 遇到非 ASCII 路径即崩;脚本默认把基因组复制到
- 国内网络注意:WSL 里 apt/conda 很慢的话,技能内
docs/wsl-setup.md第 4 节有换国内镜像的方法。
教程结构:
- Step 1|安装 phylo-tree-build 技能(只需一次)
- Step 2|配置 WSL2 运行环境(只需一次)
- Step 3|跑通示例数据
- Step 4|换成你自己的数据
- Step 5|读懂 REPORT.md
- 更多分析|配套技能简介(进化树绘图)
Step 1|Install the phylo-tree-build skill
注意:本技能的示例数据是独立的 zip 包(约 29.5 MB),与技能包分开。输入以下 prompt:
Please install the "phylo-tree-build" skill for me, into the D:\claw2bio folder:
1. Create a folder named claw2bio in the root of the D: drive (if it doesn't exist yet).
2. From the GitHub repository https://github.com/nihuanhe/claw2bio, fetch ONLY the folder
   bioinformatics/phylo-tree/phylo-tree-build (use sparse checkout — do NOT clone the whole
   repository), and place it at D:\claw2bio\phylo-tree-build.
3. If downloading from GitHub fails or is too slow, download the skill zip from this mirror
   link instead: https://claw2bio.site/downloads/phylo-tree-build.zip
   and extract it to D:\claw2bio\phylo-tree-build. The example data is a SEPARATE zip:
   https://claw2bio.site/downloads/phylo-tree-build-examples.zip — download it too and merge
   its contents into the examples/ folder of the skill.
4. Read the SKILL.md inside, then confirm to me that the skill is ready and list the contents
   of the folder (including whether examples/ has input data).
(If my PC has no D: drive, install to C:\claw2bio instead and tell me the actual path.)
Step 1 完成后,打开文件管理器确认 D:\claw2bio\phylo-tree-build 文件夹存在,里面有 scripts/、docs/、examples/、SKILL.md 等内容。
Step 2|Set up the WSL2 runtime environment
输入 prompt:
Please set up the runtime environment for the "phylo-tree-build" skill at
D:\claw2bio\phylo-tree-build. This skill runs INSIDE WSL2 + Ubuntu 24.04 on Windows:
1. First check whether WSL2 with Ubuntu 24.04 is already installed on this PC (run
   "wsl -l -v" in Windows). If it is NOT installed, follow the screenshot guide at
   D:\claw2bio\phylo-tree-build\docs\wsl-setup.md to install it — walk me through it step by
   step and wait for me whenever I need to do something manually (e.g., a reboot).
   If apt/conda is slow in China, section 4 of that same doc explains how to switch to
   domestic mirrors.
2. Once Ubuntu 24.04 is ready, run the ONE-TIME bootstrap inside WSL Ubuntu:
   cd to the skill's scripts/ folder (Windows D: drive is at /mnt/d inside WSL), then run
   "bash 00_bootstrap_ubuntu.sh" to install iqtree2/mafft and the conda environment "bcgtree".
3. Then run the ONE-TIME bugfix "python3 patch_bcgtree_gblocks.py" (fixes the bcgTree↔Gblocks
   naming bug). Do NOT skip this — skipping it causes a "Fasta::Parser ... .aln-gb" crash later.
4. IMPORTANT: all working paths must be pure ASCII (no Chinese characters) — bcgTree/Perl
   crashes on non-ASCII paths. The scripts copy genomes into ~/phylo_work by default, which
   is safe; keep it that way.
5. When everything is done, confirm to me that the environment is ready.
Step 2 只需做一次。结束后,AI agent 会告诉你 iqtree2、mafft 和 conda 环境 bcgtree 是否就绪。
Step 3|跑通示例数据
输入 prompt:
The skill is installed at D:\claw2bio\phylo-tree-build and the WSL environment is ready.
Please run the bundled example (12 public RefSeq genomes) INSIDE WSL Ubuntu, using the
skill's own scripts in order:
1. bash 01_run_bcgtree.sh    (core-genome concatenated alignment; about 10 minutes for
   12 genomes — be patient)
2. bash 02_iqtree_main.sh    (build the main tree with ModelFinder + 1000 ultrafast
   bootstraps)
3. bash 03_parsnp_subtrees.sh  (OPTIONAL group subtrees — only if the example provides a
   SampleID,Group CSV; if parsnp segfaults, this is a known bioconda build issue: skip this
   step and tell me)
4. Do NOT modify the scripts and do NOT write new analysis code from scratch — the scripts
   auto-locate the example input/output paths relative to themselves.
5. When the run succeeds, show me the generated main_tree/total_iqtree.treefile, and explain
   the REPORT.md line by line.
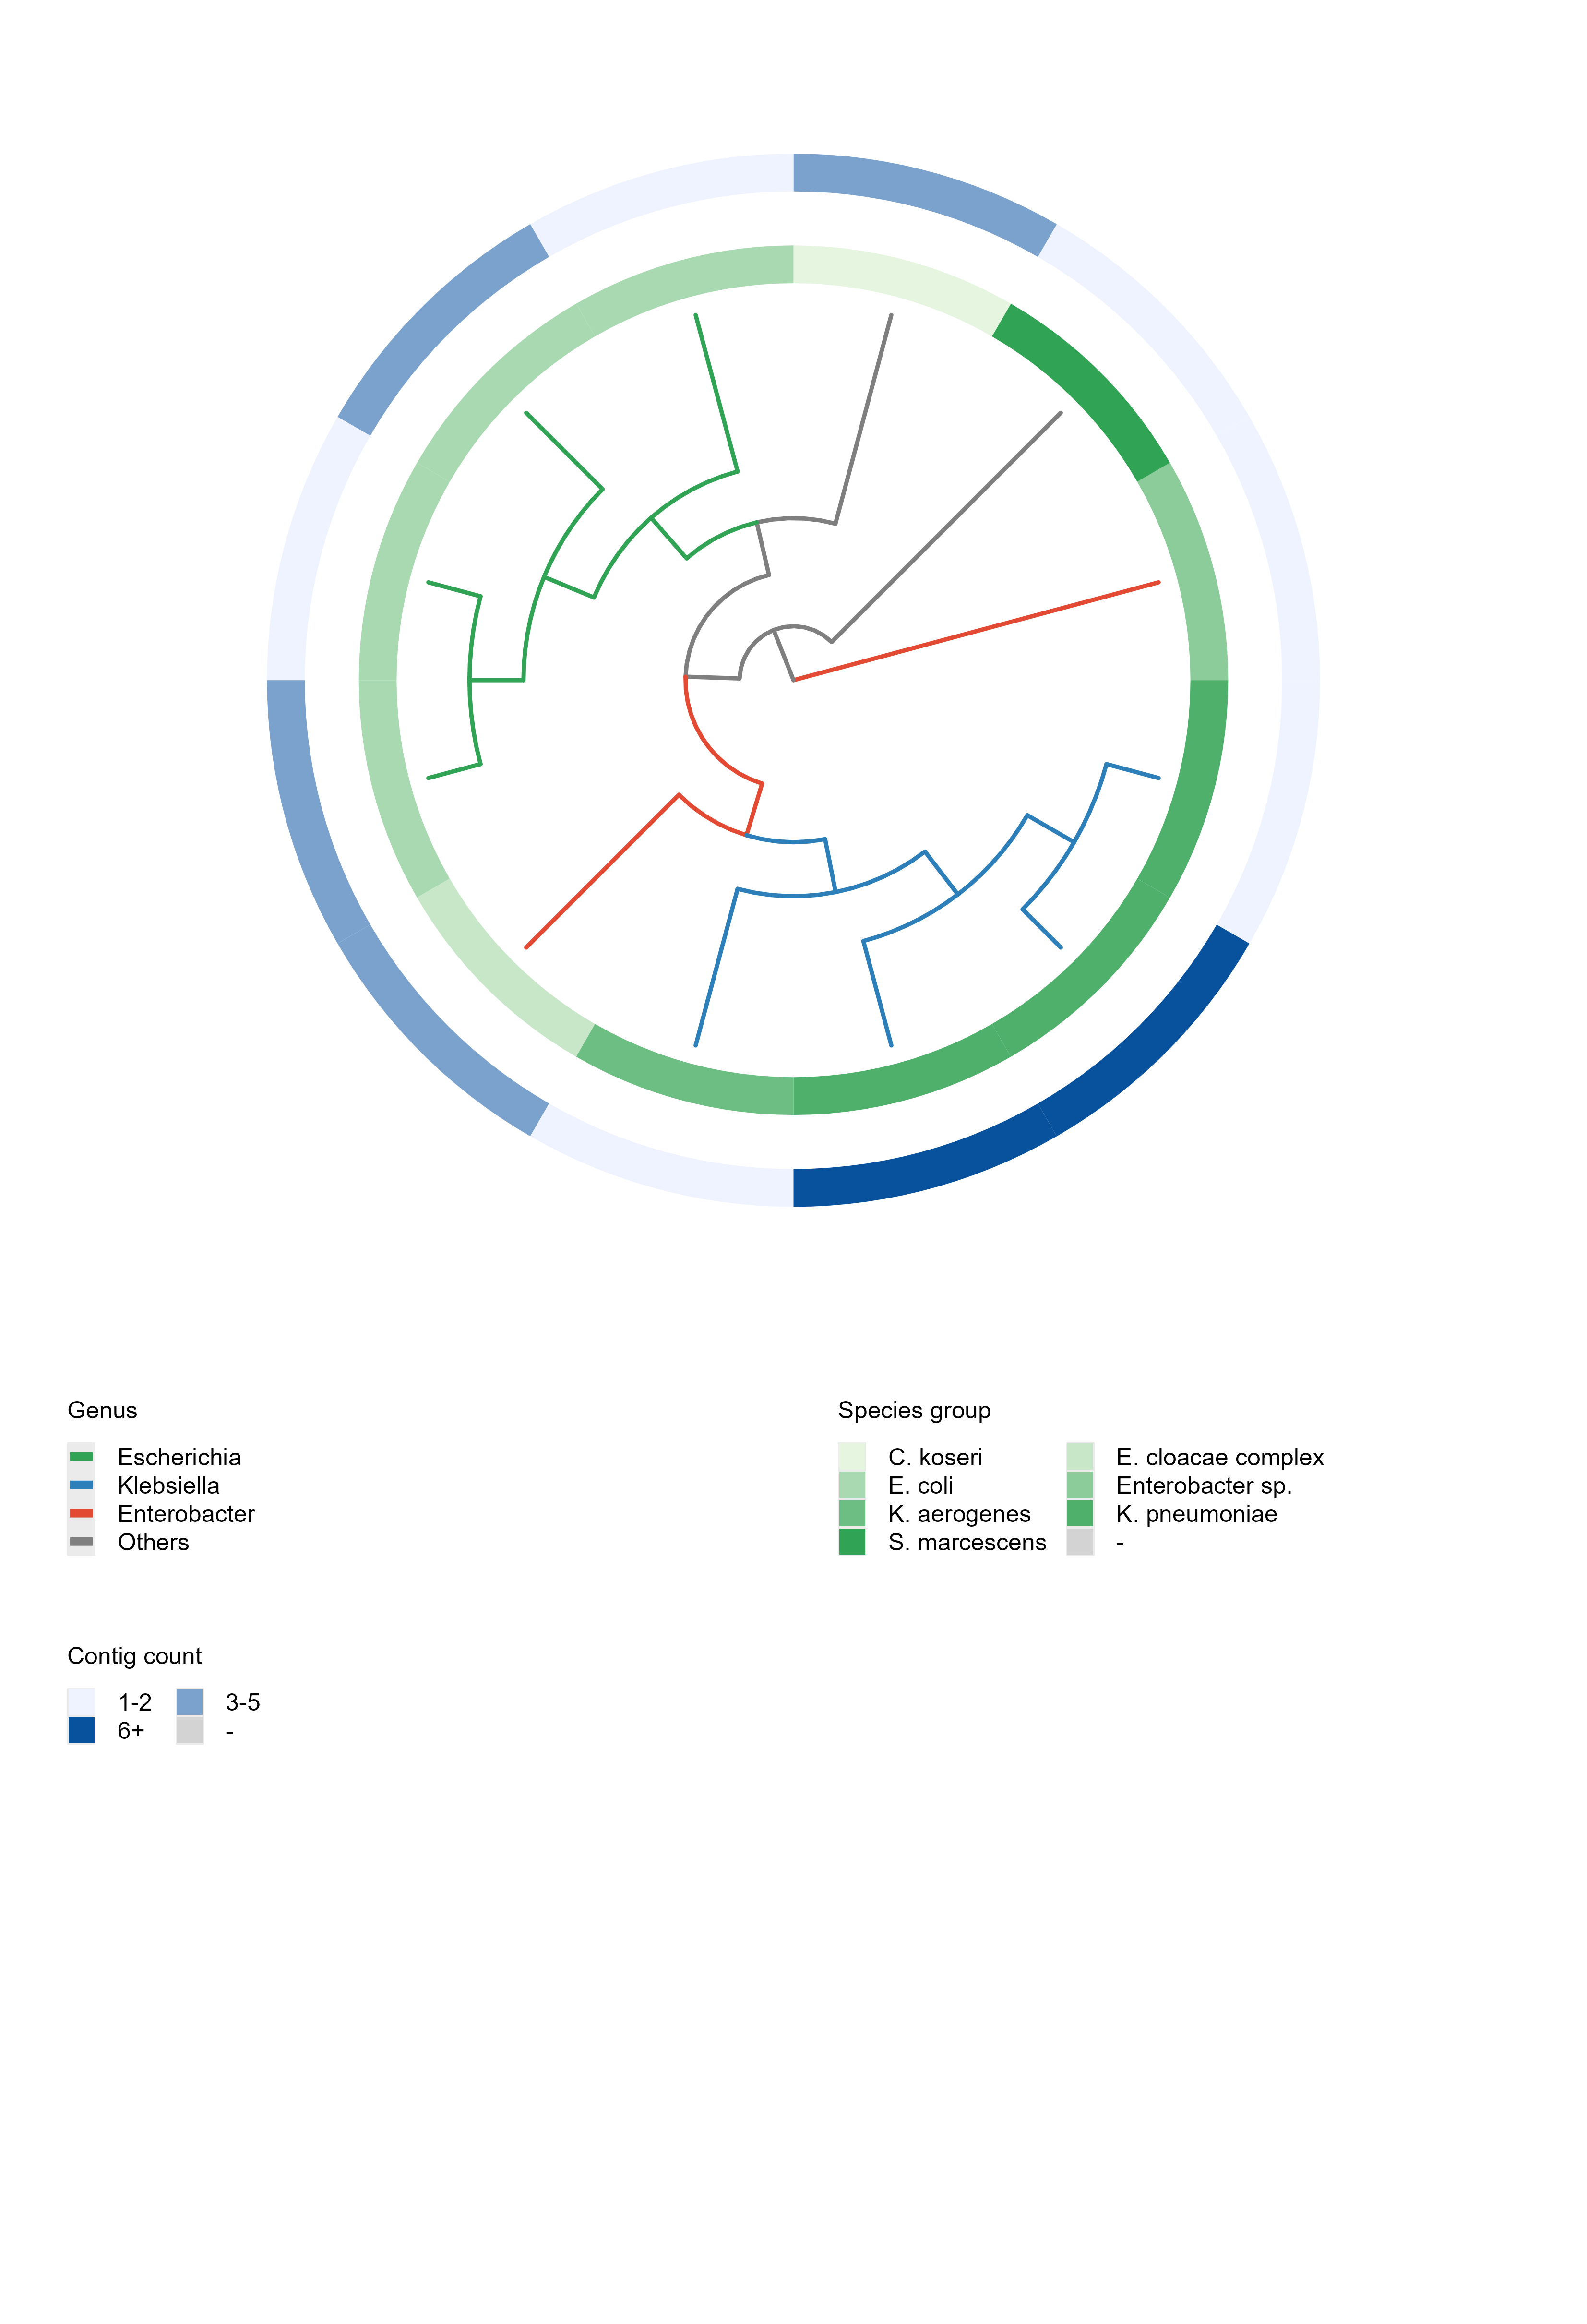
运行成功后,你会得到 main_tree/total_iqtree.treefile(Newick 主树,带 1000 次自举支持率)和核心基因拼接比对文件。记住:这一步只产树文件,不产图。下面这张效果图是配套技能 phylo-tree-plot 用本技能的产出绘制的:
Step 4|换成你自己的数据
把你自己的基因组交给它:一个目录,每个菌株一个 *.fasta,文件名主干 = 样本 ID(也是后续注释 CSV 的 SampleID)。可选一张两列 SampleID,Group CSV 用于 parsnp 分组子树。换数据不用改脚本,用环境变量覆盖路径即可。输入 prompt:
My own genomes are at: <paste the path to your folder here — one *.fasta per strain, the
filename stem is the sample ID; the path must be pure ASCII, no Chinese characters>.
<Optional: my grouping table (two columns: SampleID,Group) is at: <path> — also run the
optional group-subtree step.>
1. First check my input folder: every file is a *.fasta genome assembly, filename stems are
   valid sample IDs, and the path contains NO non-ASCII characters. If there are problems,
   fix them and tell me what you did.
2. Run the pipeline INSIDE WSL Ubuntu using the skill's own scripts, overriding paths with
   environment variables (e.g., SRC_IN=... SRC_OUT=... bash 01_run_bcgtree.sh) — do NOT edit
   the scripts and do NOT write new analysis code from scratch.
3. Run the steps in order: 01_run_bcgtree.sh, then 02_iqtree_main.sh, then (only if I gave you
   a grouping table) 03_parsnp_subtrees.sh.
4. When the run succeeds, show me the generated treefile(s) and explain the REPORT.md line
   by line.
等候 AI agent 运行结束:主树 main_tree/total_iqtree.treefile + 可选的 subtrees/<Group>.treefile。(参考:12 个基因组约 10 分钟、IQ-TREE 内存 < 4 GB;基因组越多越慢,内存不足时 AI 会降低 -nt 或减少基因组数。)
Step 5|读懂 REPORT.md
输入 prompt:
Please explain the REPORT.md in my tree-building results folder line by line:
1. What each output file is and what it contains (the main Newick tree, the concatenated
   alignment and its partition file, the optional group subtrees);
2. What the bootstrap support values on the tree mean, and which clades in MY tree are well
   supported (≥95) vs weakly supported;
3. Any warnings or things I should pay attention to (e.g., genomes that aligned poorly).
After explaining, remind me that this skill only produces tree FILES, and that I should use
the phylo-tree-plot skill to draw publication-grade figures from my treefile.
阅读完 AI 的解释,如果有不懂的直接问它。
更多分析
本技能只到"产出 Newick 树文件"为止。配套技能安装方式与本技能完全相同(一键 prompt 或网站下载 zip 包),直接吃本技能的 treefile:
进化树 · 绘图 —— phylo-tree-plot
一句话:treefile + 注释表进,带注释环的发表级进化树图出。 中点生根、枝干按分组着色、每个注释列一圈外环、独立图例网格,600 dpi PNG + PDF。它在 Windows R 里直接跑,不需要 WSL。
详细介绍与下载:/zh/skills/phylo-tree-plot