
Zero-Basics — Building Phylogenetic Trees with an AI Agent (phylo-tree-build) | Copy & Paste All the Way
This tutorial uses workbuddy as the AI agent and Hy3 as the AI API. For installing and configuring the AI agent itself, see the AI Agent setup tutorial.
Before you start (must read):
- If this is your first time doing bioinformatics with an AI agent, we strongly recommend following the bulk-RNA-seq differential analysis tutorial first, to learn the full "install skill → set up environment → run example → switch to your own data" workflow, then come back to this skill.
- In one sentence: a folder of genome fasta files in, a Newick tree file out — bcgTree concatenates core genes → IQ-TREE2 builds the main tree with automatic model selection + 1000 ultrafast bootstraps → optional parsnp group subtrees. The scripts come from a published 67-strain CRE study.
- On Windows, this skill requires WSL2 + Ubuntu 24.04 (Step 2 walks you through it). It is one of the heaviest environments in the library — but you only set it up once.
- Two golden rules (remember these):
- The working directory must be pure ASCII (no Chinese characters in the path) — bcgTree/Perl crashes on non-ASCII paths; by default the scripts copy genomes into
~/phylo_workand copy results back. - Tree building only produces tree FILES (.treefile), not figures. To draw the tree, use the companion skill phylo-tree-plot (it consumes this skill's output directly).
- The working directory must be pure ASCII (no Chinese characters in the path) — bcgTree/Perl crashes on non-ASCII paths; by default the scripts copy genomes into
- Note for users in China: if apt/conda is slow inside WSL, section 4 of the skill's
docs/wsl-setup.mdexplains how to switch to domestic mirrors.
Tutorial structure:
- Step 1 | Install the phylo-tree-build skill (one time only)
- Step 2 | Set up the WSL2 runtime environment (one time only)
- Step 3 | Run the bundled example data
- Step 4 | Switch to your own data
- Step 5 | Read the REPORT.md
- More analysis | Companion skill (tree plotting)
Step 1 | Install the phylo-tree-build skill
Note: this skill's example data is a separate zip (~29.5 MB), independent from the skill package. Paste this prompt:
Please install the "phylo-tree-build" skill for me, into the D:\claw2bio folder:
1. Create a folder named claw2bio in the root of the D: drive (if it doesn't exist yet).
2. From the GitHub repository https://github.com/nihuanhe/claw2bio, fetch ONLY the folder
   bioinformatics/phylo-tree/phylo-tree-build (use sparse checkout — do NOT clone the whole
   repository), and place it at D:\claw2bio\phylo-tree-build.
3. If downloading from GitHub fails or is too slow, download the skill zip from this mirror
   link instead: https://claw2bio.site/downloads/phylo-tree-build.zip
   and extract it to D:\claw2bio\phylo-tree-build. The example data is a SEPARATE zip:
   https://claw2bio.site/downloads/phylo-tree-build-examples.zip — download it too and merge
   its contents into the examples/ folder of the skill.
4. Read the SKILL.md inside, then confirm to me that the skill is ready and list the contents
   of the folder (including whether examples/ has input data).
(If my PC has no D: drive, install to C:\claw2bio instead and tell me the actual path.)
When Step 1 finishes, open the file manager and confirm that D:\claw2bio\phylo-tree-build exists, with scripts/, docs/, examples/, SKILL.md, etc. inside.
Step 2 | Set up the WSL2 runtime environment
Paste this prompt:
Please set up the runtime environment for the "phylo-tree-build" skill at
D:\claw2bio\phylo-tree-build. This skill runs INSIDE WSL2 + Ubuntu 24.04 on Windows:
1. First check whether WSL2 with Ubuntu 24.04 is already installed on this PC (run
   "wsl -l -v" in Windows). If it is NOT installed, follow the screenshot guide at
   D:\claw2bio\phylo-tree-build\docs\wsl-setup.md to install it — walk me through it step by
   step and wait for me whenever I need to do something manually (e.g., a reboot).
   If apt/conda is slow in China, section 4 of that same doc explains how to switch to
   domestic mirrors.
2. Once Ubuntu 24.04 is ready, run the ONE-TIME bootstrap inside WSL Ubuntu:
   cd to the skill's scripts/ folder (Windows D: drive is at /mnt/d inside WSL), then run
   "bash 00_bootstrap_ubuntu.sh" to install iqtree2/mafft and the conda environment "bcgtree".
3. Then run the ONE-TIME bugfix "python3 patch_bcgtree_gblocks.py" (fixes the bcgTree↔Gblocks
   naming bug). Do NOT skip this — skipping it causes a "Fasta::Parser ... .aln-gb" crash later.
4. IMPORTANT: all working paths must be pure ASCII (no Chinese characters) — bcgTree/Perl
   crashes on non-ASCII paths. The scripts copy genomes into ~/phylo_work by default, which
   is safe; keep it that way.
5. When everything is done, confirm to me that the environment is ready.
Step 2 is one-time only. When it finishes, the AI agent will tell you whether iqtree2, mafft, and the bcgtree conda environment are ready.
Step 3 | Run the bundled example data
Paste this prompt:
The skill is installed at D:\claw2bio\phylo-tree-build and the WSL environment is ready.
Please run the bundled example (12 public RefSeq genomes) INSIDE WSL Ubuntu, using the
skill's own scripts in order:
1. bash 01_run_bcgtree.sh    (core-genome concatenated alignment; about 10 minutes for
   12 genomes — be patient)
2. bash 02_iqtree_main.sh    (build the main tree with ModelFinder + 1000 ultrafast
   bootstraps)
3. bash 03_parsnp_subtrees.sh  (OPTIONAL group subtrees — only if the example provides a
   SampleID,Group CSV; if parsnp segfaults, this is a known bioconda build issue: skip this
   step and tell me)
4. Do NOT modify the scripts and do NOT write new analysis code from scratch — the scripts
   auto-locate the example input/output paths relative to themselves.
5. When the run succeeds, show me the generated main_tree/total_iqtree.treefile, and explain
   the REPORT.md line by line.
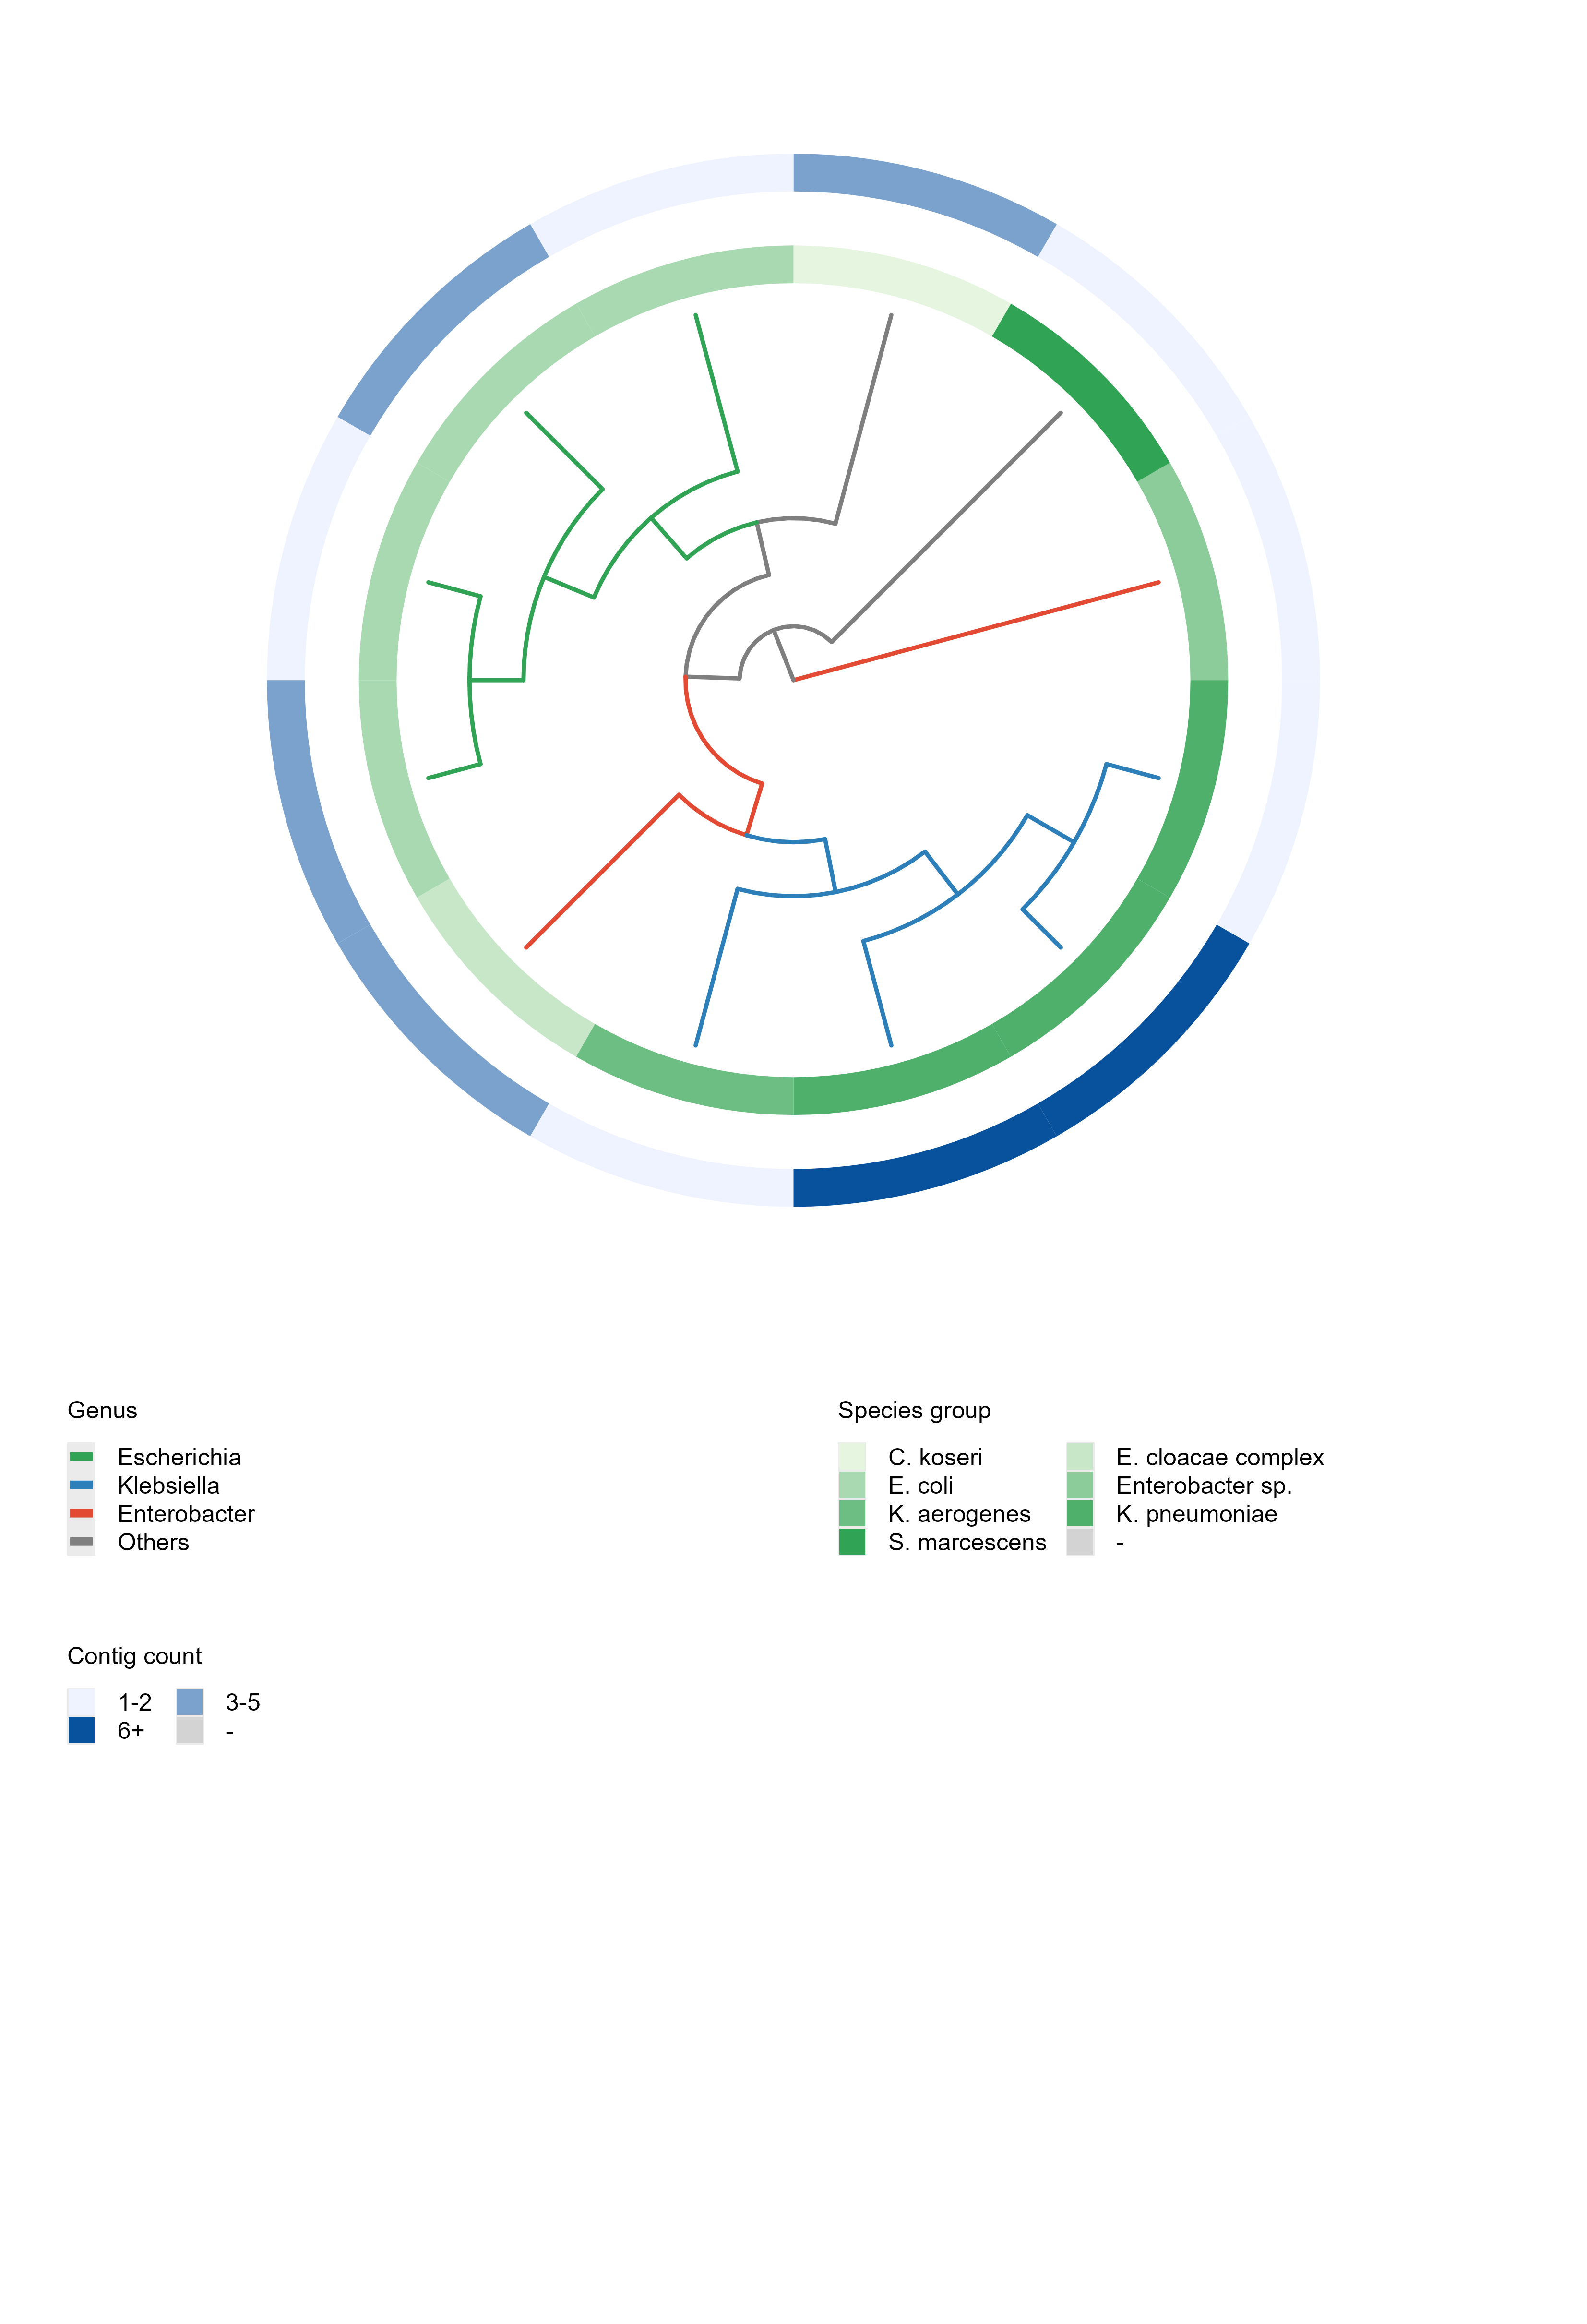
When the run succeeds, you get main_tree/total_iqtree.treefile (Newick main tree with 1000-bootstrap support values) plus the concatenated core-genome alignment. Remember: this step produces tree files only, not figures. The figure below was drawn by the companion skill phylo-tree-plot from this skill's output:
Step 4 | Switch to your own data
Hand over your own genomes: one folder, one *.fasta per strain, filename stem = sample ID (also the SampleID in later annotation CSVs). Optionally a two-column SampleID,Group CSV for parsnp group subtrees. No script editing needed for your own data — paths are overridden with environment variables. Paste this prompt:
My own genomes are at: <paste the path to your folder here — one *.fasta per strain, the
filename stem is the sample ID; the path must be pure ASCII, no Chinese characters>.
<Optional: my grouping table (two columns: SampleID,Group) is at: <path> — also run the
optional group-subtree step.>
1. First check my input folder: every file is a *.fasta genome assembly, filename stems are
   valid sample IDs, and the path contains NO non-ASCII characters. If there are problems,
   fix them and tell me what you did.
2. Run the pipeline INSIDE WSL Ubuntu using the skill's own scripts, overriding paths with
   environment variables (e.g., SRC_IN=... SRC_OUT=... bash 01_run_bcgtree.sh) — do NOT edit
   the scripts and do NOT write new analysis code from scratch.
3. Run the steps in order: 01_run_bcgtree.sh, then 02_iqtree_main.sh, then (only if I gave you
   a grouping table) 03_parsnp_subtrees.sh.
4. When the run succeeds, show me the generated treefile(s) and explain the REPORT.md line
   by line.
Wait for the AI agent to finish: the main tree main_tree/total_iqtree.treefile plus optional subtrees/<Group>.treefile. (Reference: 12 genomes ≈ 10 minutes, IQ-TREE memory < 4 GB; more genomes take longer — if memory runs out, the AI will lower -nt or reduce the genome count.)
Step 5 | Read the REPORT.md
Paste this prompt:
Please explain the REPORT.md in my tree-building results folder line by line:
1. What each output file is and what it contains (the main Newick tree, the concatenated
   alignment and its partition file, the optional group subtrees);
2. What the bootstrap support values on the tree mean, and which clades in MY tree are well
   supported (≥95) vs weakly supported;
3. Any warnings or things I should pay attention to (e.g., genomes that aligned poorly).
After explaining, remind me that this skill only produces tree FILES, and that I should use
the phylo-tree-plot skill to draw publication-grade figures from my treefile.
After reading the AI's explanation, if anything is unclear, just ask it directly.
More analysis
This skill stops at "Newick tree file produced". The companion skill below is installed in exactly the same way (one-click prompt or zip download) and consumes this skill's treefile directly:
Phylogenetic tree plotting — phylo-tree-plot
One sentence: treefile + annotation table in, publication-grade annotated tree figure out. Midpoint rooting, branches colored by group, one annotation ring per column, separate legend grid — 600 dpi PNG + PDF. It runs in Windows R, no WSL needed.
Details & download: /skills/phylo-tree-plot